- How to Find the Best Drum Pedals - December 8, 2021
- Best Marching Snare Drum Guide: With My Top 4 Recommendations - December 3, 2021
- Best Overhead Drum Mic Options - December 1, 2021
Interested in drumming lessons? No matter if you’ve just purchased your first drum set or aren’t sure where to begin, this guide will teach you the basics of drumming.
To get started with drumming, I will teach you how to pick the right equipment for you, how to play the drums, and even how to read basic music.
Understanding Your Kit
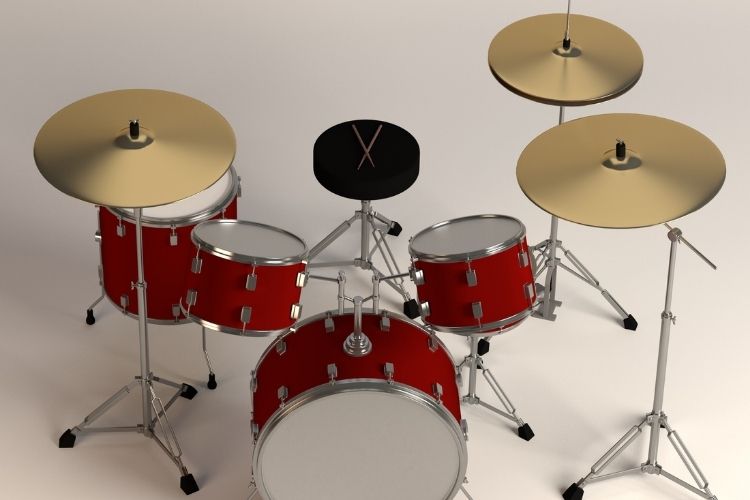
The term “drum set” is sometimes used interchangeably with the term “drum kit.” When it comes to how many parts and which pieces you may use to produce music, the drums are an instrument that has no right or wrong. The focus of this guide is on the fundamental components that will get you started on the drums quickly and easily.
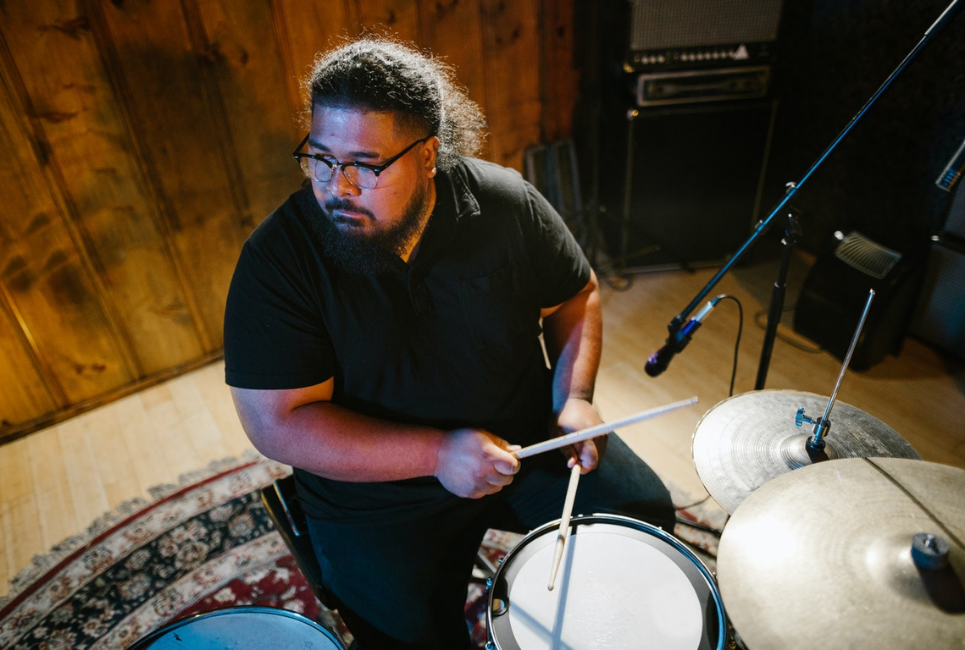
The key pieces you should understand and be able to recognize on your kit are the: snare drum, bass drum, high tom (or first tom), mid tom (or second tom), and floor tom (or low tom). I will go over each one in a more detailed fashion below.
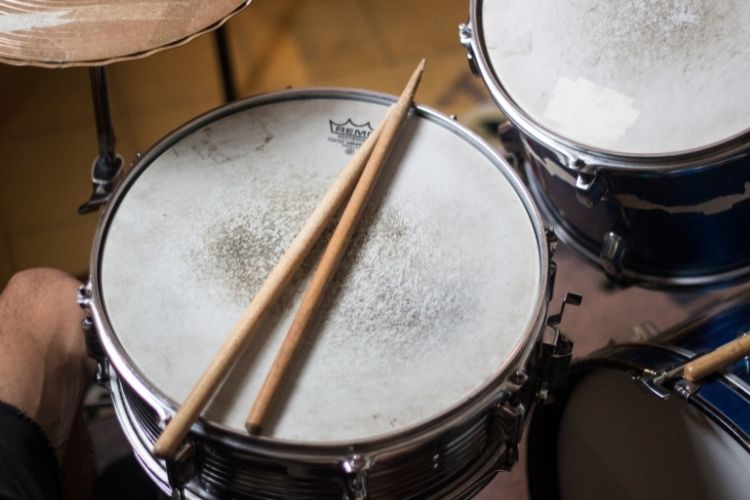
Snare Drum
Right in front of you, this snare sits facing you. Vibrating cables beneath the snare drum give it its distinctive sound. You may alter the tightness of the’snare’ sound by using a lever (or ‘throw off’) and dial, although this isn’t something you should do until you are comfortable playing.
Bass Drum
This will be your kit’s largest element. It sits on the floor under your other drums and is positioned between your legs. also known as a kick drum. Two little “legs” keep it in position on the floor, and it provides your beats with that low ‘boom’ sound. A beater (or’ mallet ‘) is used with a bass drum pedal to strike the bass drum’s surface.
A single pedal is used by the majority of drummers. Metal and rock drummers, on the other hand, may utilize a double pedal for rapid rhythms.
Toms
Tom drums come in a range of sizes and are used for drum fills and tribal rhythms. They make up the “meat” of the drum sandwich and are usually in the middle of your kit.
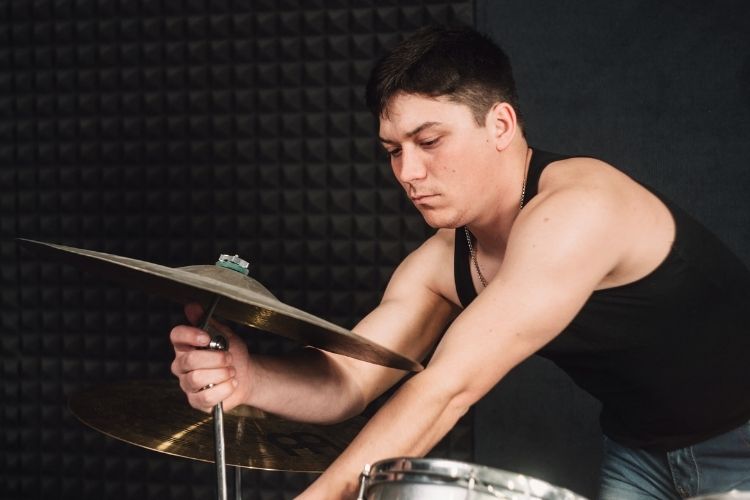
Ride Cymbals
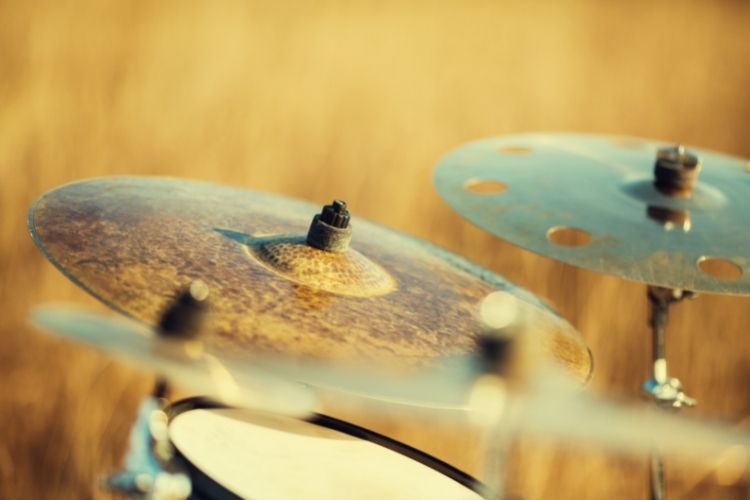
These are often the largest cymbals in a set, and they have the most surface area as well. Unlike other cymbals, this one has a distinct ‘ping’ sound. It will be located on your left or right.
Crash Cymbals
When punctuating or accentuating your drum sections, these cymbals may offer a blast of sound. They come in many different sizes (and price points) and offer a unique sound in comparison to your drums.
Hi-Hats
The hi-hat is a combination of two cymbals that are stacked on top of one another. On a hi-hat stand, the pedal on the stand allows the top hi-hat to open and shut. The hi-hat is probably the most recognizable part of any kit and is prevalent in a lot of modern day music.
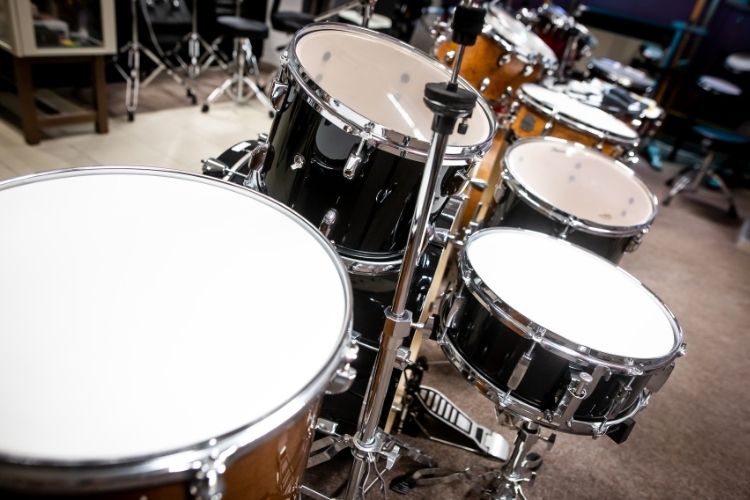
Drumheads (or’skins’) for each drum are also required. In most cases, the drum has two heads: a battering head and a resonant head. Together, they provide the drum’s entire sound.
This membrane is stretched over one or both open ends of a drum to create a drumhead. In order to make the drumhead vibrate and produce sound, it is hit using sticks, mallets, or your hands.
Choosing Your Kit
Where do you begin? How can a beginner drummer tell whether the drums are good? How many sizes of drums are there available?
Starting off with an entry-level kit, whether new or secondhand, is the best option for a novice. Both are affordable, and you can easily upgrade to a better model if you decide to pursue playing. Having mastered the drums, you’ll be able to dial in your ideal sound.
The larger the drum (in width or depth), generally speaking, the quieter it will sound, so keep this in mind when buying drums. The broader the cymbal, the lower the pitch.
Other elements, such as thickness, can affect the sound of a drum or cymbal, and you’ll learn more about different materials and production processes in the following section.
Another option is buying an electronic drum set. These are great for beginners as they are quiet and can be worn with headphones. Electronic kits aren’t for everyone, however, as they are electronic and lack the feel of an acoustic set. For the purpose of this article, we will be talking about acoustic kits.
They can be constructed from metal or acrylic. In general, birch and maple are the most commonly used woods (they are warm and full). Drums constructed of oak, mahogany, walnut, and other exotic woods are also available.
Plasterboard is used to create drum shells, which are then bonded together and pushed into place. This is done by adding a metal “rim” to each end of the drum and attaching it to it using lugs or rods (which are used to hold the drumheads in place and tune the drum).
The Cost of a Kit
For a drum kit, you can spend a few hundred dollars, or thousands. In terms of quality, the sky is the limit with price. In the beginning, you had the option of using high-quality equipment, or learning on the cheap. This selection may be dictated by the size of your wallet or your willingness to shell out some serious cash.
It’s not uncommon for retailers to sell low-quality drum kits manufactured from unusual materials for less than $150. Consider buying a secondhand kit ($250-450) that has seen better days.
Spending between $500 and $1000 on an entry-level kit, $1100-1800 on an intermediate/pro set, or $2500+ on a high-end set is normal.
You may also buy completely custom kits from several drum manufacturers. I wouldn’t recommend these for any beginner though, as they can range in price from $2500 to $10,000 or even more.
Drumsticks
On the surface, many drummers’ drumsticks seem the same, yet there are minor differences that can make a huge difference to your sound or feel. Sticks aren’t costly, so you might try out a few different types before settling on the one you like most.
Drumsticks come in a variety of sizes, including 2B, 5A, 5B, and 7A, which are the most commonly used sizes. When the number is less, the stick will be larger. 2Bs are the thickest and heaviest, while 7As are the thinnest and lightest of the four. For novices, the 5A or 5B drumsticks are the finest because they’re adaptable to any kind of playing.
At first, you won’t notice much of a difference in drum sticks, other than the weight and length. As a general rule, drumsticks cost approximately $15, but they can range from $2 (no-name) to $30 (branded) (ultra-strong polyurethane).
The price per pair drops when you purchase in quantity. However, you may notice inconsistencies or differences in the feel of the sticks if you purchase a cheap set of drumsticks from a discount bin as a novice drummer.
As a beginner drummer, I recommend just buying a cheap pair of 5A sticks and starting to play. Worrying about the inconsistencies and differences in sticks won’t make you a better player. Playing the drums will, though.
Next Steps
After obtaining all your gear and the tools needed to play, you should be ready to play, right? Nope! Not yet. You still need the hardware that goes along with your kit. This includes stands for your drums and a seat for yourself. A lot of this may come with your drums, but some of it may not. We’ll go over it either way.
Drummers Seat
A drummers seat (also called a throne) has either three or four legs (most stable). Their seats may be lowered or lifted, and they usually feature a tractor-style seat or a rounded seat.
Cymbal Stand
Each cymbal will require its own stand (except the hi-hats). A three-legged stand that may be raised and lowered, with either a single or double brace for added support.
Straight stands and boom stands are the two most popular forms of cymbal stands, aside from the hi-hat stand. This type of stand has a restricted range of placement around your drums since it grows like a telescope.
A Hi-Hat Stand
A pedal raises and lowers the top hi-hat, giving you a washy sound while it’s open, and a more “chick” tone when it’s closed.
Snare Stand
You may use it to adjust the height and angle of the drum.
Bass Drum Pedal
Using your foot to lower the pedalboard lowers the mallet (the ‘beater’) so that it may strike the front of the drum. Plastic, wood, and felt can all be used to make the beater.
Earplugs
You may forget about one of the most important parts of your set. That’s the earplugs. These will protect you from hearing loss, as the drums will be loud!
I recommend buying all used hardware (except earplugs). This will save you a lot of money at first, and drum hardware is pretty hard to break.
Setting up Your Kit
Now that you’ve obtained all the right pieces and tools, You can set your kit up so it’s ready to play. This is one of the most enjoyable parts of the entire process (besides drumming) and is similar to setting up Ikea furniture.
Start by placing your drums on a mat or rug to prevent them from sliding around on the floor. You don’t need a special drum rug to begin, although they are handy investments later on.
Prepare your throne and trap stand. Loosen the wingnut nearest to the feet, take out the legs, and then tighten the wingnut back up again. You’re now ready to sit on your throne!
Opening up your cymbal stands is next (except for the hi-hat stand). After loosing one of the wingnuts at the feet, pull up the legs, and then tighten them after the legs are most of the way open (don’t open them all the way, otherwise your stand will fall over).
Telescoping shaped parts may now be loosened, raised to the desired height, and then tightened again. The height is entirely up to you. Sit on your throne and determine the correct height!
Hi-hat stand legs should be removed. Check to see that the pedal’s base is on the ground. In the future, you’ll be able to adjust the height, so don’t worry about it too much from the start.
Placing the bass drum in front of your right foot, with a few inches between your toes and the front of the drum, is a great way to start. There is a little incline to the right. As soon as the drum is steady, loosen the drum’s two legs (make sure they’re facing away from you) then tighten them. Once tightened, the drum should be stable and not move anywhere.
Add a bass drum pedal to the bass drum and tighten it down. It’s important to put your foot on the pedal slightly farther forward than your knee (more than a 90 degree angle).
Assemble the snare stand and place it in front of you so that it’s in easy reach. If necessary, adjust the stand’s height. Again, the height isn’t super important at first, as you can always change it once everything is set up.
Drums should be quite flat and sit just below your belt buckle when you’re sitting. I like my kit to have a slight angle towards me. I think it makes it easier to play.
As you place the hi-hat stand, make sure that your left foot is naturally resting on the pedal of the hi-hat. This stand should be angled away from you if possible (slightly to the left).
Toms should be added at this point as one of the final touches. Using a tom holder on your bass drum, you should place the little tom on your left and the medium tom on your right. On your right leg, the last (and largest) thump should be within easy reach.
As a rule of thumb, make sure your crash cymbal stands are both the same height. Placing a left and a right snare drum on either side of the high tom is a great idea. In most cases, you’ll place the ride cymbal on a lower stand than you would for the crashes. Simply place it over the floor tom on your right, directly above it.
Placing the bottom hi-hat cymbal (the heavier one) on the stand with the rod going through the middle is a good way to start. If the clutch is still on the stand, remove it. Remove the clutch’s bottom screw and felt.
On top of that, flip it over and lay the top hi-hat (the one with the logo and model name) upside down. Replacing the felt and screws. Placing it right side up on the hi-hat rod will allow it to hang properly. Since it’s adjustable, you may use it to open or close your hi-hats.
Tuning Your Drums
The next step after setting your kit up is tuning the drums. While most people might overlook the tuning section, it is one of the most important.
Luckily for you, tuning your drums is really straight forward. Your snare, bass or tom is ready to tune once the tension rods have been gently tightened. The tension rods are found on the side of the drum.
Rotate the tension rods in a star-like pattern and give each rod a gentle turn. Hit the drum. Give each rod a quarter turn if the sound is flat and continue until you have the desired sound you want.
Playing the Drums!
Now let’s get to the exciting part. Your kit is set up, tuned, and you have all the necessary equipment to start playing! The first step in learning to play the drums is learning to read drum tab/sheet music.
Four is the most important number in most popular songs. Your beat presumably follows the quarter-note beat (one, two, three, four). There are four quarter notes in a ‘bar’ (or’measure’). When you’re learning your first drum beats and fills, knowing how to count bars and quarter notes can help you keep organized.
My personal advice when learning music is to count out loud. In the following section, you’ll learn more about how to divide a bar of four quarter notes into eight eighth notes, and then into sixteen sixteenth notes or thirty-two thirty-second notes.
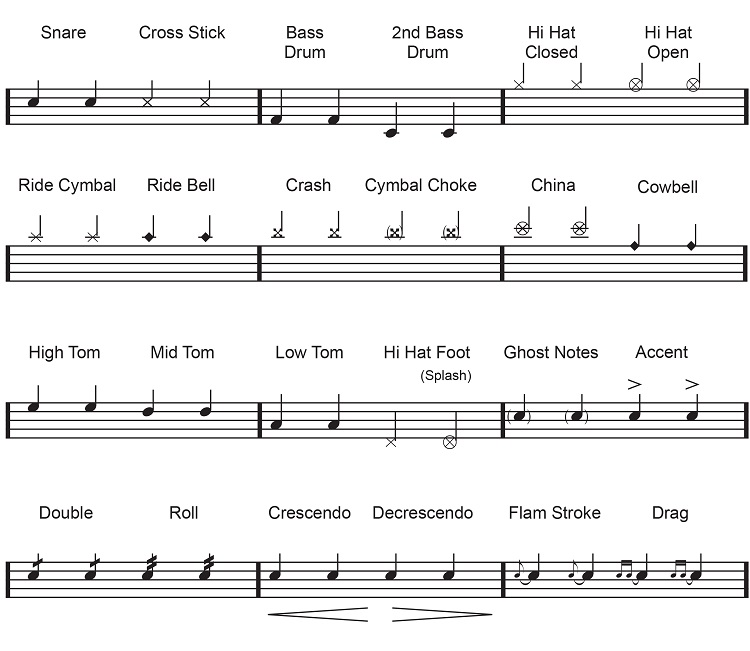
What you read music on is called the staff. It has 5 lines and (usually) 4 beats (4 quarter notes) per measure. A measure constitutes the beats in between the dark black lines (as seen below). Below is a picture of the different symbols you will see while reading music, and what each note equates to.
There is a value to each note (or rest, the absence of notes) and this value is called the duration. To hold a note in non-percussion music, for example, would be to play the note for an extended period.
Drummers just need to take care of the placement of these notes or pauses for the time being. Below is an image with the depiction of each note (and rest) and what they look like.
Drum workouts using Rs and Ls are common. Sticking is a term used to describe certain types of drumming. The R and the L allude to beating the drum with the right and/or left hands, respectively. It indicates right/left/right/left hand when you see RLRL.
In addition to its numerous variants, this combination may also be performed on the feet. The R and L signs are usually shown over the notes and staff.
I’ll be honest, reading music is the most difficult section in this article, and the hardest part of learning drums. It will be challenging and you may need some additional help. I’ve linked a basic video here to help. I really recommend watching it even if you feel like you fully understand, as it will help immensely.
Drumstick Lessons
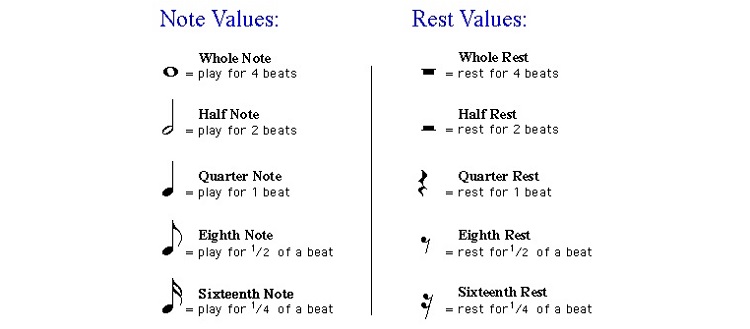
Often overlooked by beginners, is how to hold your drumsticks. There are a bunch of different ways to do this, each good for different styles and people, and we’ll go over them here!
In a matched grip, both hands are held in a comparable downward position. Some drummers employ a traditional grip with one hand up and the other down. This is preferred by marching drummers and jazz drummers. To begin, let’s take a look at how to use the most common match-grip.
Consider holding a pencil in your hand with your fingers curved slightly. In this hand, place a stick such that the butt of it rests on the fleshy portion of your palm (by your pinky finger).
Fingers 1 and 2 (thumb and pointer) will have most of the control, so you can let them wrap around the stick a bit. Your hand should be about 3/4 of the way down the stick.
Two common grip errors include “pointing” the index finger along the stick and gripping the stick excessively tightly (the “death grip”). Try your best to steer clear and not to pick up any of those bad habits.
- American Grip: The American grip is a position for most types of playing. All you have to do is slightly turn up your hands.
- German Grip: The German grip is best for when you need a lot of power in a hit. All you have to do is turn your palm down.
- French Grip: The French grip is best for intricate, softer playing. All you need to do is put your thumbs up!
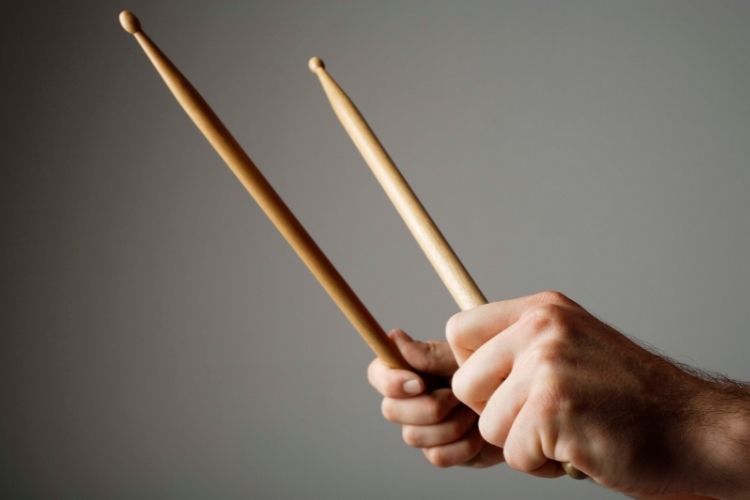
Using a Metronome
A metronome doesn’t mean you have bad timing. Rather, the opposite, that you are working to make sure your timing is absolutely perfect.
A metronome keeps time by emitting a sound (usually a click or beep). In addition, the regular pulses will aid in developing a strong sense of timing, as well as a consistent amount of space between notes.
A metronome is a crucial tool for studio drummers and live drummers who rely on their drumming to synchronize with other instruments, lights, or samples in real time. A metronome can be set at a certain BPM or beat per minute. This is what decides the tempo, or pace, of a song.
Drum Fills
As the name implies, a drum fill is a pattern or rhythm used to transition between two portions of music. From verse to chorus, a drum fill is often used. Playing fills at the conclusion of a four-or eight-bar phrase is a common way of practicing.
The best part about a drum fill is that it can be creative. Usually less scripted and more improvisational, you can really begin to experiment with your drum fills.
Practice Routine
One of the most important things beginners can do for themselves is devise a regular practice schedule. This will allow drummers to improve significantly faster than if they practiced irregularly. Let’s go over the routine!
Warming Up
Warming up doesn’t only mean stretching before a game; it also involves doing some easy exercises when you sit down to get your blood flowing slowly and effectively. Because drumming involves a lot of continual movement, it’s important to get your body warmed up before you start playing.
Beginner stretches include wrist circles, elbow pivots, and shoulder circles performed 30 times in each direction.
Always have a plan for your practice sessions. Don’t forget to set goals for yourself! Do you have a certain beat in mind? Trying to speed up by 10 BPM? What song are you currently learning? It will also encourage you to play more if you keep your practice sessions interesting and diverse.
Even if you just have 30 minutes or two hours a day, make an effort to practice every day. It will become increasingly difficult for you to avoid practice if you establish a regular regimen.
Product Recommendations
There are three major things you should start with: drum sticks, a practice pad, and metronome. This will be the cheapest equipment to get you started quickly.
Vic Firth American Classic 5A Drum Sticks
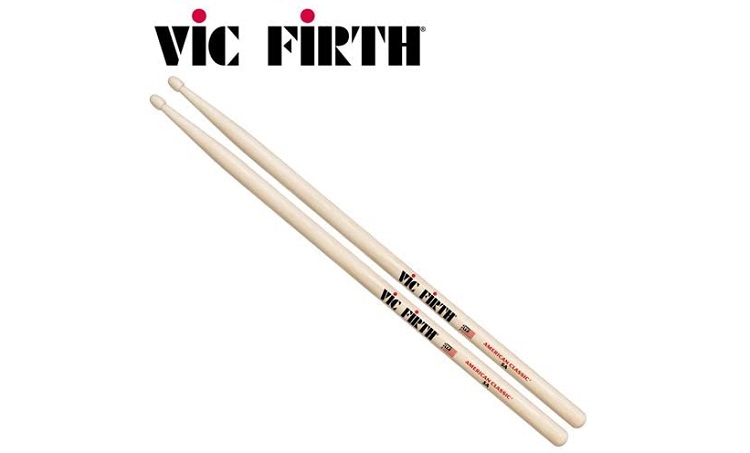
These are the best drum sticks a beginner can buy! They’re chosen by almost everyone, even advanced players still play with the Vics. This is mainly because of their versatility and ability to play almost anything.
Pros
- Affordable, versatile
Cons
- Not the best quality, will wear out over time
Practice Pad Set with Stand
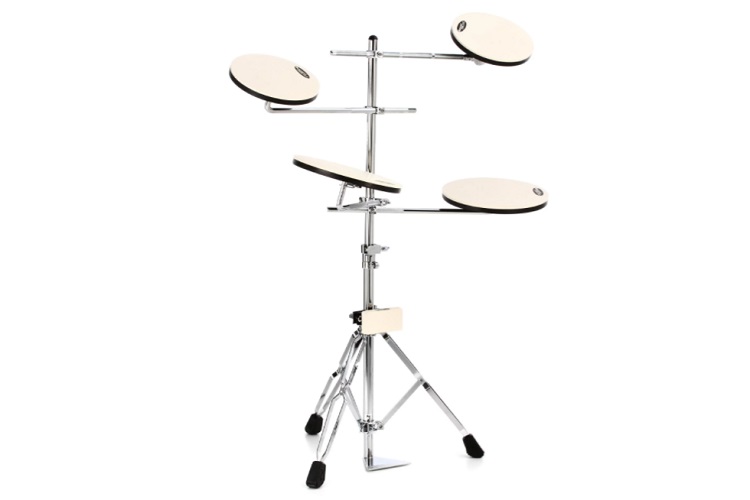
This practice pad is a little more robust than other basic practice pads. It comes with a stand, which I think is essential for a beginner. It gets you in the habit of practicing in a similar fashion to an acoustic kit. This kit comes with four pads and a completely adjustable stand.
Pros
- On a stand, four pads, stimulates a “real” kit
Cons
- Hardware isn’t the best quality
Boss DB-30 Dr. Beat Metronome
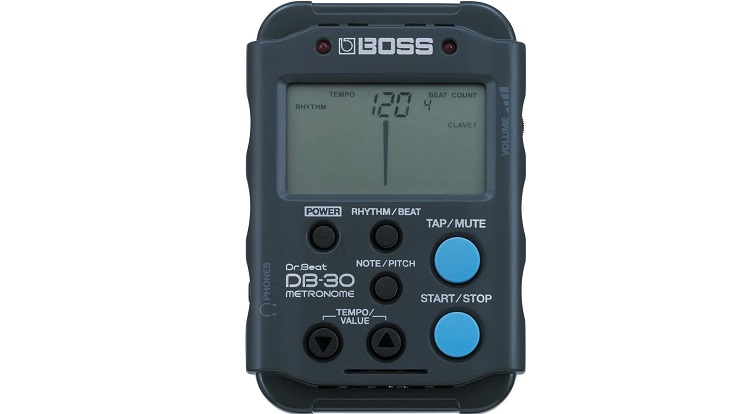
Metronomes is the last thing I recommend purchasing as a beginner. It will allow you to play in a certain time. It really helps with beat keeping. I recommend playing with it all the time!
There are cheaper options out there. Plenty of metronomes are on the market. This is a mid-line one that is pocket-sized and has various settings and beat patterns. It is the perfect metronome that you will have for a lifetime.
Pros
- Unbreakable, various settings, lasts a lifetime
Cons
- Reviews say battery life could be better
Mistake Beginners Make
Every drummer has been there. They can all give you a piece of advice. These are some things I’ve learned along the way and some things you should look out for.
- Warm up! If you don’t warm up, you’re wasting your time. After not warming up before playing, you’ll be unable to perform as much and you’ll be more prone to injury and soreness.
- Unprotected ears. Your musical career as well as the rest of your life might be affected if you don’t use hearing protection.
- The Death Grip. Bad technique habits don’t get any worse than this! Making it difficult to play, as well as not sounding or feeling nice, by gripping your sticks too tightly might cause damage.
- As a novice drummer learns new rhythms and techniques, many focus on their stronger hand or foot and ignore the weaker one. It’s possible to sound inconsistent if you disregard the weaker one, especially while playing drum fills, and you could have trouble keeping up with harder patterns if you do.
- Use that metronome! Metronome-free practice: In fact, you are a human, not a machine. A metronome is essential for keeping track of your timing, especially in the early stages. A metronome will keep you honest, highlight any discrepancies, and make you a better drummer than if you just played a beat and thought you were on time.
- Make and set goals. To begin with, learning a couple of enjoyable rhythms is quite acceptable. There are a lot of beginner drummers that don’t know where to proceed from here. If you have objectives, you know what to strive for. Set some goals. It’s easy to become lost on the road if you don’t have a clear destination in mind.
- Keep practicing even if you want to move on. Before you’re ready, go on: Perfection is achieved via repetition. To declare yourself “good enough” before you’ve mastered a skill or pattern is a terrible notion. If you don’t have a firm foundation, you’re going to have trouble with more advanced abilities. Do not rush into anything. Take the time to do it right.
Lastly, I’ll provide some of my own resources that I use and that will help you. If you’re reading this, that probably means you are in the business of teaching yourself. I commend you. It is incredibly hard to teach yourself the drums, so don’t give up.
Let me tell you a word of advice though. When I was learning drums, I resisted taking any lessons. It was my own personal agenda to teach myself, no matter what anyone said. I wish I had taken lessons.
Don’t make this same mistake. Even if you only take one or two lessons, another person (especially a professional) can help you much better than any YouTube video or online guide.
That being said, here are a few videos that I recommend watching:
FAQ
Answer: If you have the passion, discipline, and willingness to practice, you can teach yourself to play the drums. It will be tricky but I recommend watching many YouTube videos and consulting online guides. There are books at music stores that will help as well.
Answer: You should spend two hours on your drum pad for every hour spent in drum classes. You can learn the drums pretty fast if you have determination, ability, and hard effort – say, 10 to 12 months to become skilled, and 18 to 2 years to get very good.
Answer: This question has elicited responses from a wide range of musicians throughout the years, and their responses are generally diverse. Drums are more difficult to play than guitar, to put it simply. Nonetheless, the guitar is a difficult instrument to master.
Answer: A beginner should practice drums on a regular basis. You should practice basic beats, rhythms, as well as music theory. The more time spent on drums, the better you will be!
Conclusion
If you hit a roadblock, take a lesson or two, professionals can really help get you moving and inspire you to keep playing. Whatever you do, don’t give up; the beginning is always the hardest.
Looking for more interesting readings? Check out: