
- Lights, Camera, and Action: How to Film and Edit a Drum Cover - May 31, 2022
- The Best Wuhan Cymbals: A Comprehensive Buying Guide - May 30, 2022
- Alesis Surge vs Command Compared - April 26, 2022
Perhaps one of the most distinct characteristics that help define a band’s sound is the quality of their drum recordings. Acoustic drum kits produce a wide range of frequencies which can, in turn, raise a number of challenges for drummers when it comes to recording them.
Sure, you can get a good quality recording of your drums by using expensive overhead mics. However, a set of condensers and dynamic microphones will expand the horizons of your creative potential like nothing else.
Your drum kit is an assembly of multiple units (drums, cymbals, and hi-hats), all of which make a unique contribution to the overall sound of the kit. Add in the fact that a microphone can only cater to a single drum at a time, and suddenly the cost of your favorite studio mic — the one you’ve been eyeing for a while — has just dramatically multiplied.
This is where drum mic kits step in. In general, a drum mic kit comprises individual microphones for the snares, toms, kicks, and cymbals. Some drummers also prefer having separate mics for hi-hats, which come as an optional unit with some kits.
No doubt, getting a great drum mic kit can be a sizable investment for someone on a budget. On the bright side, though, it’ll save you a lot of money in the long run.
With this guide, I aim to share the knowledge and experience that I’ve accumulated with you. In turn, I hope to help you make informed decisions regarding microphones and recording drums in general.
What Are Microphones (And Why Do We Need Them)?

A microphone is essentially a transducer, which converts sound vibrations into electronic signals. In other words, it scribes mechanical wave energy to a recording medium. Their applications extend through many fields such as music recording, digital media, telecommunication, medicine, civil engineering, and other applications.
On the basis of directionality, microphones can be categorized into the following types:
- Omnidirectional. This type of microphone can pick up on sounds from all sides due to its circular polar plot. They’re mainly used in studios for recording voice or musical instruments.
- Unidirectional. As the word suggests, this type of microphone can capture sound coming from a single direction only. Its polar plot is adjusted so that it picks up on sound signals when the source is right in front of it. They can be used for voice-over during an interview or neglecting background noises in loud places.
- Bidirectional. Bidirectional microphones, also known as figure-of-eight microphones, are designed to pick on sound from the front as well as the back. They’re exclusively used in audio interviews between two people when you want to capture both sources with equal intensity.
- Close-talk. These types of microphones are typically used in phones and voice-recognition software to capture excellent voice quality in close quarters. Some models also feature a hum-bucking coil which is used to negate unnecessary sound interference.
- Clip-on. Also known as lavalier, lapel mic, or personal mic, these hands-free mics can be clipped to ties, collars, or other clothing. These are mainly wielded during television interviews, public events, and live theatre performances.
The Early History of Microphones
Many argue that the original microphone came from Alexander Graham Bell, who invented the telephone. The very first telephone used a needle that was placed in water to map out the vibrations of the voice. The changing movement of the liquid would manipulate an electrical current that was transmitted to a receiver on the other end.
The next best iteration of the microphone came from Emil Berliner back in 1877, who created the world’s first carbon button microphone. He was able to achieve this by using an electroconductive diaphragm. This model applied superior technology when compared to Bell’s water-based model, and it’s a lot closer to the modern microphones we have these days.
The digital era of microphones was kicked off by Sony when they introduced the first consumer PCM encoder PCM-1 Audio Unit in 1977. This phase in the world of recording saw Digital Audio Tape (DAT) being used as a consumer format.
These DATs were capable of recording at sample rates of 48 Khz and 44.1 Khz. Then in the early 1990s, multi-track digital recorders quickly picked up a lot of steam, thanks to the fact that they were relatively low-priced.
What to Look for When Buying Microphones
Drum mics typically come in three flavors: dynamic, condenser, and ribbon. Here are some points to consider each type:
| Dynamic Mics | Condenser Mics | Ribbon Mics |
| Can withstand loud sounds without causing distortion | Susceptible to distortion from loud sound sources | Very susceptible to distortion from loud noises |
| Captures overall intensity with less detail | Captures a high amount of details, especially on delicate parts (like embellishments on cymbals) | Captures significantly less detail due to their directional pattern |
| Response is rather slow, which can compress the attack of drums | Respond readily and reproduce more accurate representations of the drum’s attack | Tend to have a scooped off high end, landing them in the middle (and also soothes out some of the drum’s attack) |
Drums are innately loud, so it’s important to bear in mind at which limit the mic starts distorting. Luckily, you can easily purchase a device online (or in your favorite brick-and-mortar music shop) that lets you monitor your sound levels in dB.
Fortunately, an SPL (sound pressure level) meter doesn’t cost a lot of money. However, it does have tons of utility in the recording process, so you’ll definitely want to consider buying one.
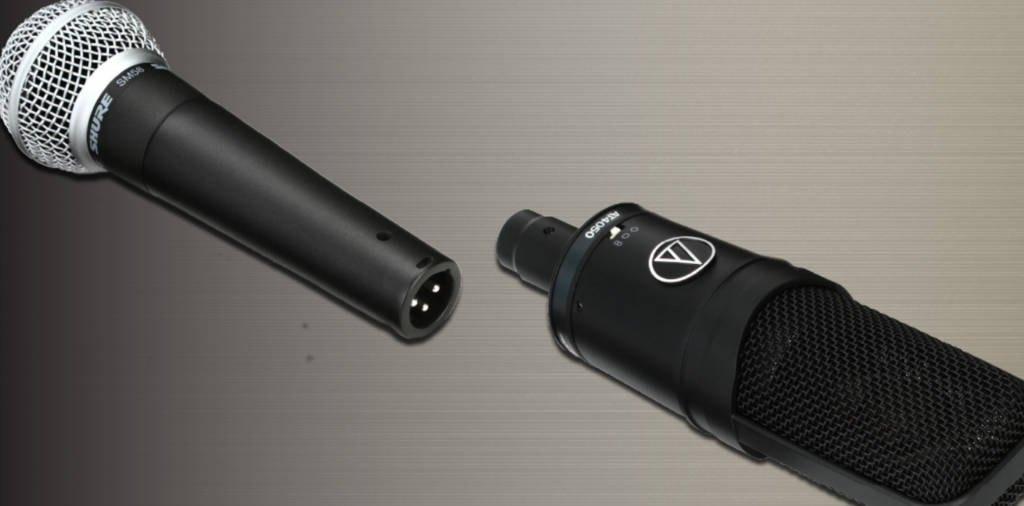
The Main Differences Between Condenser and Dynamic Microphones
Based on the application, you may be required to use a condenser or a dynamic microphone when you play. Here are some key points that highlight the main differences between the two:
- A dynamic microphone is better at capturing loud noises (like drums and guitars), especially live instruments, whereas condenser mics are great for recording delicate sounds (studio vocals), particularly in a studio setting.
- A dynamic microphone doesn’t require external power, whereas a condenser microphone does.
- Dynamic microphones have low sensitivity and higher gain threshold, allowing them to take in a lot of signal without damaging their diaphragm, whereas condenser microphones have higher sensitivity, possibly leading to distortion when the signal gets too hot.
- Dynamic microphones can capture a wider range of sound, whereas condenser microphones offer more accuracy and dynamics.
- Passive dynamic microphones terminated by very low impedance can color the sound, whereas condenser microphones introduce little to no coloration in the sound signal.
The Advantages of Miking a Drum Kit
- Recording your practice sessions and later analyzing them for areas of improvement is an excellent practice routine. Miking your drum kit will allow you to monitor your sound closely, and therefore work on your weak spots rather efficiently.
- There are many ways you can record drums with decent audio quality these days. Even phones can record a standard quality clip of drums for online uploads. But when it comes to studio-like quality, you want to use the right tools. If you’re recording professional demos or music, there’s really no real alternative to microphones.
- The sheer amount of detail and overtones you can catch with a condenser mic is simply incomparable. Even electronic drum kits fail to recreate satisfactory results while still recording soft and quiet parts on drums.
- Many drummers often wonder whether they should mic up their live kit for smaller venues. Although miking up a drum kit isn’t always necessary or possible in smaller venues, I’d still suggest that if you can do it, then do it. You’ll get far better results with a direct sound to the PA, and the overall mix of the band would be easier to manage.
The Disadvantages of Miking a Drum Kit
- You need specific mics for specific drums. Every instrument in your drum kit has its own sweet spot on the frequency spectrum, so capturing their sound with utmost fidelity also requires different types of microphones. For instance, miking a hi-hat with a microphone better suited for kick drum will result in a loss of those high frequencies that you want. It could take years for drummers to develop their ears and general knowledge of drum miking, and even then the learning curve seems to be unending.
- It can be difficult to adjust for the recording studio. Many novice players don’t properly factor in-room ambiance or the other dynamic variables necessary for making drums sound full and lively when recording. Miking your drums for a live performance is much easier than studio sessions, as you don’t need to consider the room’s ambiance.
- Knowing the right placement can be tricky. Finding the right distance and angle of placement for the mic can be a very tiring process. EQ techniques can only do so much to shape your sound after you have captured it, which is why tweaking the sound right at the source becomes so imperative.
- Trying to avoid phase cancellation can be incredibly frustrating. Phase cancellation during drum recordings occurs when two microphones pick up on the same sound but are out-of-sync with each other. When two signals are 180 degrees out-of-sync, they wind up canceling each other out, causing a weak signal.
- The price of a good kit can be a bit steep. Theoretically speaking, you can use a single mic to record your entire kit, but you most certainly won’t like the end result of that. Most drum mic kits are made without a budget in mind, and some high-end variants can cost thousands of dollars.
Best Drum Mic Kit (2022)
I’m excited to share my picks for the best drum mic kits with you. Before I dive in, though, you deserve to know exactly why I chose these specific ones. With that in mind, here are the things I kept in mind when curating my top choices.
What Was My Evaluation Criteria?
- The Collection of Mics. You definitely can’t ignore this aspect of drum mic kits, as it has the biggest impact on their sound. Depending on your kit, you should have a rough idea of how many mics you’d need for your snare and toms. Most importantly, though, you need to be clear about whether or not you need an overhead mic.
- The Type of Mic. A dynamic, condenser, or ribbon… which one is it going to be? The choice of microphones will squarely depend on the choice of music, your playstyle, and the tone you desire from your drums.
- The Sound Quality. The biggest factor that dictates the quality of sound microphones recreated is the type of electronic circuitry they employ. High-end models tend to sound better and organic, whereas cheaper models can lack in certain areas of sound quality. They can also suffer from issues such as sound coloration and compression too.
- The Cost. Let’s face it. Industry-standard mics can cost a significant amount of money. But if you think about it from a long-term perspective, it starts to make more sense. That said, there’s no doubt you can still cobble together a decent-sounding drum mix with a starter drum mic kit.
Earthworks DK7
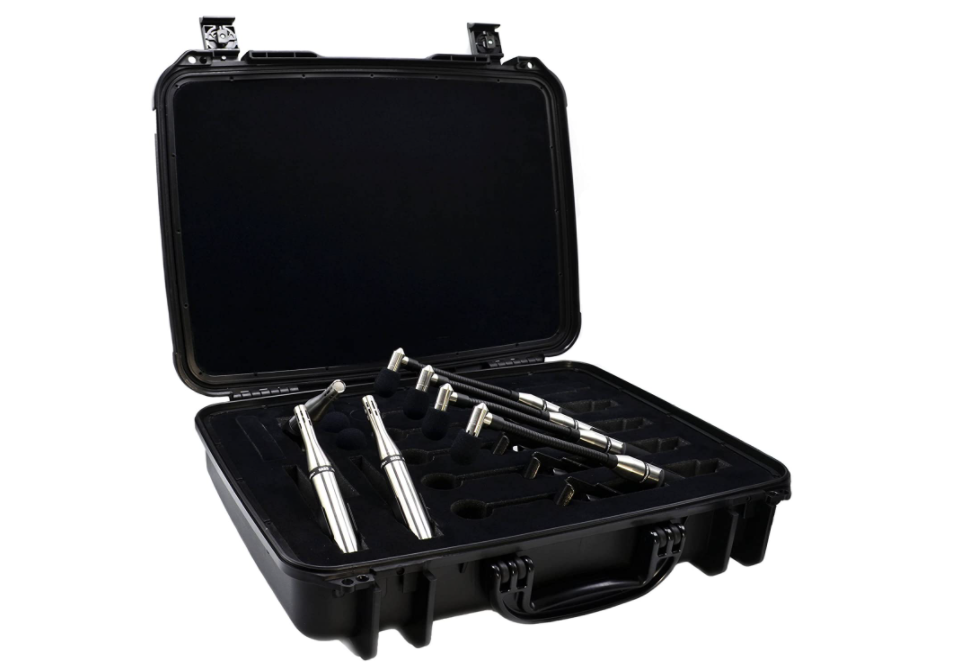
Built for studio engineers, session drummers, gearheads, and drum fanatics alike, the Earthworks DK7 is in a class of its own. When sound quality and versatility tops other variables in your recording process then you want to work with equipment that derives flawless results.
This drum mic kit packs seven condenser-type microphones that capture sound with high precision. In the pack, you get four DM20s (for snares and toms), two SR25MP overhead mics, and an SR20LS.
The DM20s are easy to handle and mount on your drums with the integral gooseneck. In addition to the seven stylish-looking microphones, you’ll also get a carrying case that’s equally eye-catching and practical. You might be thinking, though, “At the price of an entire drum kit, is this mic set really worth it?”
Well, if this is your first mic kit, then perhaps not. But for seasoned drummers and studio engineers, this can be a game-changer. Earthworks has always had its main focus on quality and innovation, which really shows in the end results you can end with this mic kit.
Pros
- High-fidelity audio
- Stylish design
- Precision placement clamps
Cons
- Higher price
- No dynamic mic option
Audix DP7
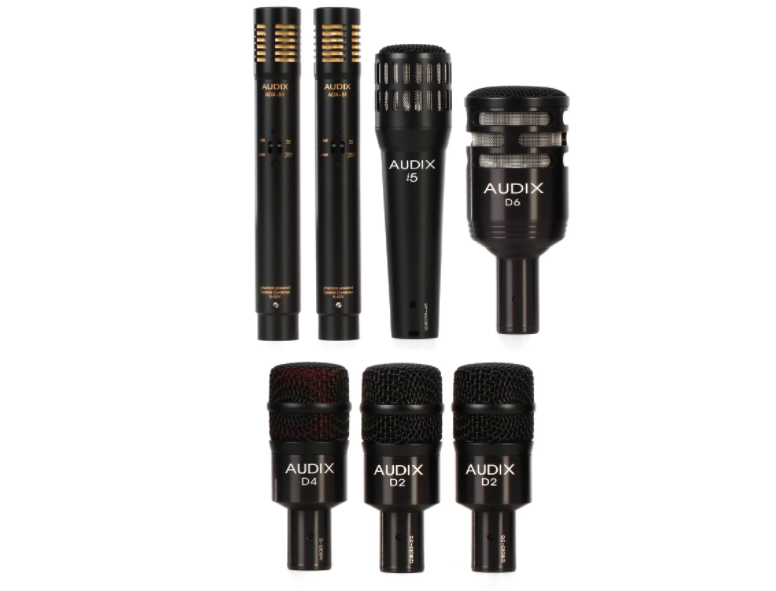
Audix, along with Shure, has been crowned as one of the best drum mic brands in the industry. They have mustered up quite a fan following with their incredible line-up of microphones and other recording gear in recent years. Coming back to Audix with their DP7, it’s clear they’re trying to create a one-stop-shop for the recording needs of all types of drummers.
This pack comprises an Audix i5 for the snare, D2s and D4s for the toms, a D6 mic for the kick drum, and a pair of AD51s to be used as overhead mics. The highlight of this kit is the Audix D6 mic for the bass drum, though, which is arguably one of the most popular mics in the community right now.
The D2 and D4 mics seize the warmth and punchiness of toms very accurately, which is highly appreciated by jazz and rock drummers. The overhead mics are specifically designed to pull a balanced sound of the entire kit, which has been pre-EQ’d by Audix, to tame the sound a bit.
Pros
- The D6 kick drum mic
- Versatile selection of mics
- Great sound quality
Cons
- Fairly expensive
- Voicing doesn’t suit every style of music
Shure PGA Drum Kit 7
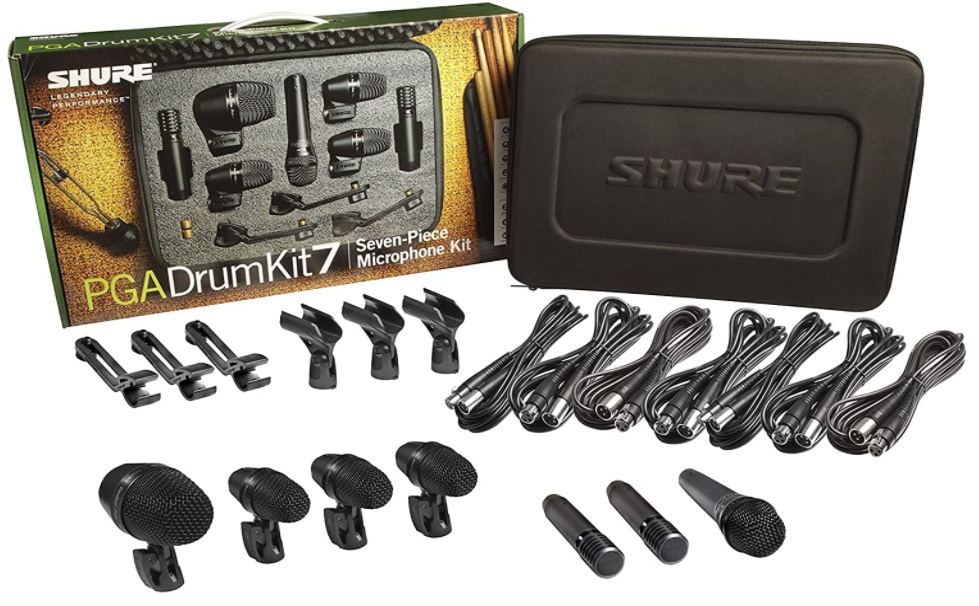
In my humble opinion, this list wouldn’t be complete if it didn’t include at least one of the flagships from the star brand, Shure. Many drummers swear by the sound of their microphones because of how iconic they have become in the music industry. This isn’t just a great-sounding mic kit, either.
It also includes a few classic models, all of which are considered the industry standard in certain musical styles. With this 7-piece mic kit, you get a PGA52 mic for the bass drum, PGA56 for toms, PGA57 for snare, and PGA 81 overhead mics. The PGA56 does a great job of accenting the low frequencies of the bass drum and outputs a thick tone.
The PGA57 bears a close resemblance to the Shure SM57 and is very proficient in bringing out the richness of the snare drums. If you’re on a smaller budget and looking to get a great-sounding drum mix, then you won’t go wrong with the Shure PGA Drum Kit 7.
Pros
- Solid value for money
- Great kick drum mic
- Versatile mic choices
Cons
- Can find better choices for a slightly higher price
- Sound isn’t the best quality
AKG Drum Set Premium
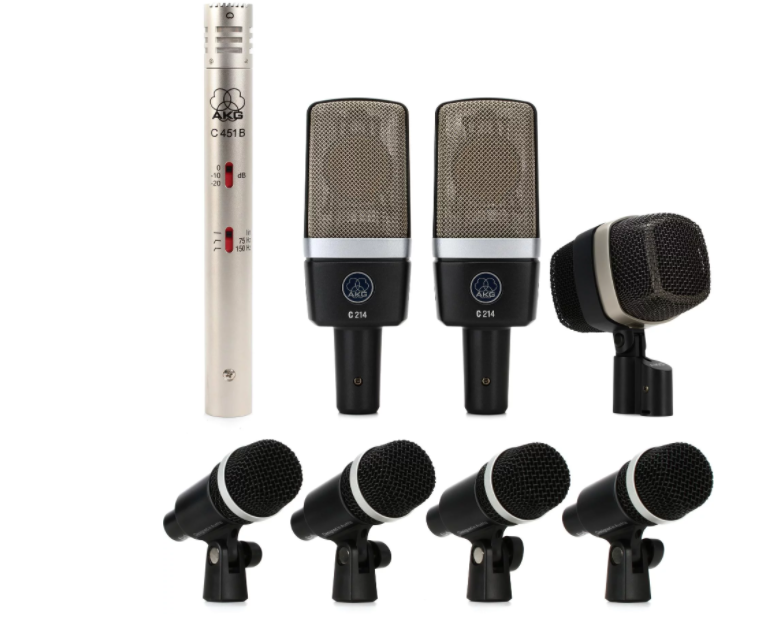
Another word that gets thrown a lot amongst drummers is “AKG.” This is a brand that has practically reinvented the format of drum monitoring with their D12 and D112 mics. With their drum set premium, you’ll get your hands on the current model of D12 — the D12 VR.
Furthermore, you’ll also get four D40 mics for snares or toms, a pair of C214 large-diaphragm mics, and a C451 B condenser microphone for the hi-hats. The D12 VR integrates active circuitry to draw dynamic features out of your drum sound and depends on phantom power to juice its components.
The C214s are successors of the prominent C414 mic, which has a great range and saturation of frequencies. This iteration eliminates some of the drawbacks of its older brother by offering a simplified feature set.
AKG is known to cater to a wide range of audiences with a diverse line-up of products. You can find more affordable options from AKG but the Drum Set premium delivers phenomenal performance at industry-standard levels, so it’s almost a no-brainer for studio recordings.
Pros
- Great collection of mics for live and studio use
- Industry-standard sound quality
Cons
- Lacks placement options such as hoop mounts
- Quite expensive
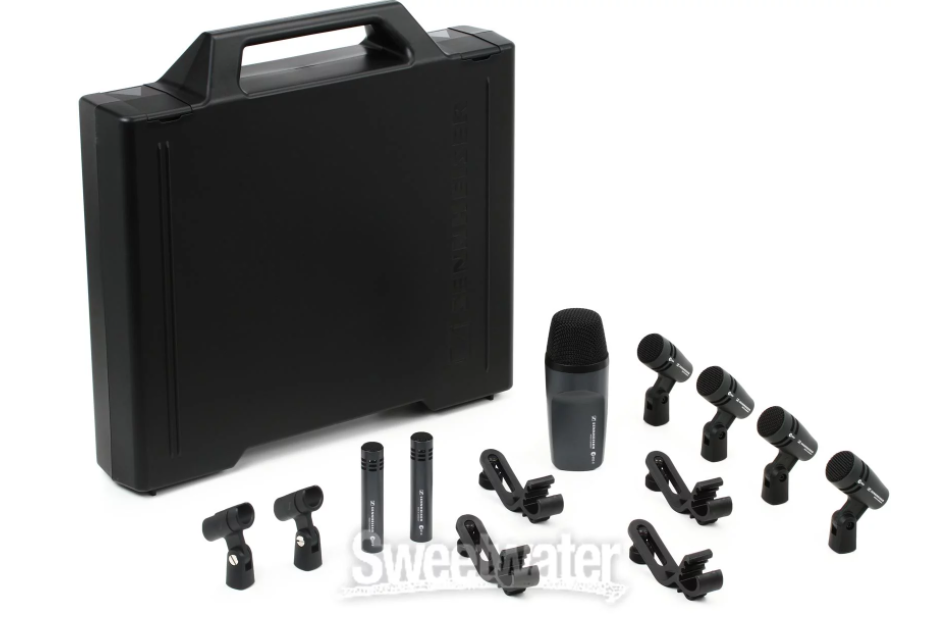
Sennheiser E600
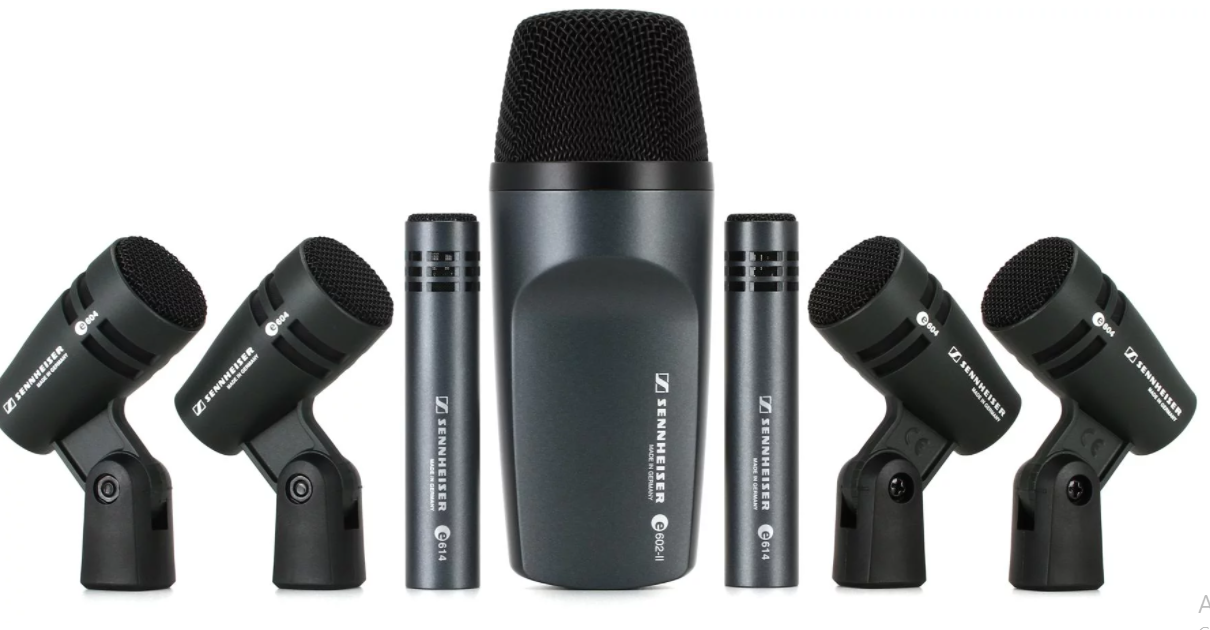
If you favor a mid-range option that doesn’t compromise too much on the quality side of things, then the Sennheiser E600 series is for you. This is a rather smart collection of dynamic and condenser microphones, of which you may have spotted many times in the past when miking up a live kit.
In this pack, you’ll get 4x E604s for snare or toms, an E602E-II kick drum mic, and a pair of E614 condenser microphones. Another plus of this kick is the hoop mounts that make for easy clipping of mics to the drums. Drummers have sided with this kit for many years for miking their kits in live settings, so if that’s in your interest, you definitely should consider this option.
When it came to the sound quality, I was more than satisfied with the amount of detail and dynamics this bad boy could produce being a mid-range collection of mics. That said, while the MD421 is a studio staple for toms, you do sometimes feel the absence of overhead mics.
Pros:
- Good placement options
- Industry-standard mic solutions
Cons:
- No pads on the condenser mics
- Can possibly find better options at the same price point
What Are My Top Picks?
- Best Audio Quality: Earthworks DK7. This kit is a guaranteed return on your investment. Whether it’s quality, aesthetics, or sound quality, Earthworks delivers on every front.
- Most Versatile Drum Mic Kit: Sennheiser E600. This kit offers a solid mid-range pick that works brilliantly for many musical styles, including rock and metal. This is a great choice for beginner, intermediate, and advanced drum players.
- Budget Drum Mic Kit: Shure PGA Drum Kit 7. This kit is a fantastic choice for both beginners and for someone who is looking to record their practice sessions at home. This seven-piece starter kit comes in the same mic configuration as some of the higher-end kits.
Some Recording Tips for You
- I can’t stress this enough: tune your drums before each recording session. That’ll save you from a ton of post-processing and EQ hacks in the future. Fine-tuning your toms is vital, as they’re tuned to different intervals, depending on how many you have in your kit.
- Phase issues can be annoying, but the best way to avoid them is by following the 3:1 rule when miking your drums. It suggests that your second mic should be placed at least three times the distance from the first mike as it is from the source.
- Setting the right amount of attack and decay on your gates is essential to get the desired amount of punch from your drums. Some engineers prefer having dynamic processing elements before equalization, whereas others prefer them afterward. To gain maximum control over your sound, try to introduce gates and expanders in your signal chain.
- Whether you’re using subtractive or additive EQ (equalization), use them to pinpoint the lacking areas in your recordings, then shape them as needed by boosting or fading the signal.
- Hands down, one of the most underrated topics when it comes to recording drums is compression. Subtle forms of compression (like bus compression) and parallel compression techniques can help you adjust the dynamics of the recording once you’ve balanced out the frequency spectrum post-EQ’ing. This will let you bring out the tiniest details to help make your drums sound rich and full.
- To add a sense of depth and dynamic detail to your recordings, you’ll need to depend on a variety of reverbs, like pedals or software in your DAW. You should be able to distinctly hear the reverb trail decay of individual hits to avoid a muddy mix. Going overboard can dramatically impact the output of your mix, though, so be cautious.
Frequently Asked Questions
Answer: There’s no doubt you can get high-quality recordings of your drum kit with just two to four microphones, all without compromising on many other factors. In some circumstances, however, you can get an even better finish on your product with more microphones (up to twelve or sixteen).
Ideally, you’ll want to get a dynamic mic for your kick drum and place it six to twelve inches from the resonant head of the drum. Next, you want to use two overhead mics and place them four feet above the snare and six inches away from the floor toms. That way, you can record your drums just as they sound in the room, with realistic low end and well-rounded mids.
When it comes to drum miking, I’ve settled on one of my own rules: the more the merrier. You want to get as many mics on that kit as possible to help capture the maximum detail and character of your drums. This is why drum mic kits are a reasonable choice for drummers, as you can get a lot of mileage out of a single investment.
Answer: Condenser mics require 48v phantom power to run, which is either supplied by the mixer or a preamp. These types of mics have active electronic components that require a power supply to work, while dynamic mics are passive in nature and don’t require phantom power.
Answer: In the simplest of terms, overhead mics are the ones that usually hang on top and capture the entire sound of the drum kit. Using overhead mics helps you add subtle nuances to your sound in the post-processing stage.
Placement is key when it comes to overhead mics, as otherwise, they tend to create a lot of interference with close-mics. Condenser mics are definitely a suitable option for overhead mics.
Answer: Depending on the type of drums you’re miking, the choice of microphones should vary as follows:
Kick drums: For kicks, you want a mic that picks up on plenty of air and captivates the natural intensity of the low end. Neumann FET47 is a classic go-to mic for bass drums, whereas AKG 414 and the Audio Technica 4033 are more flexible options that can be used on other components, as well.
Snare drums: You can’t go wrong with a dynamic mic when capturing the sound of snare drums. The Shure SM57 has always been the top choice in this department, with EV RE10 and Lewitt 440 DM mic rounding up close seconds. For mellow tones, condenser mics such as the Neumann KM84 and AKG 451 should do the job fairly well.
Toms: If you like to incorporate multiple floor and rack toms in your drum kit, you’ll find that miking your toms separately can yield great results. Depending on your taste, feel free to experiment with both dynamic and condenser options when miking up toms. You can’t go wrong with the Miktek PM11, Lewitt 340 TT, or the Sennheiser 421.
Overhead mics: The most common way of using overhead mics is to use a stereo pair over the drums. Both condenser and ribbon mics are considered best for overhead miking. (Some of the top choices include Miktek CV3, Roswell K47, AKG 451, Coles 4032, and Royer 121.)
Room mics: Room mics are a great way to add realism and surround sound to your drums, especially if you’re going for a huge sound with tons of low-end activity. Metal, rock, and grunge bands have historically used room mics to add that extra punch of excitement and clarity to their mixes. Some expert choices for room mics include Miktek C7, Marshall 2001, Lewitt LCT 640, and Altec M20.
Answer: Depending on the volume, character, and intensity you need, the placement of mics will vary. For the main sound, you’ll want to keep your mics between one to three inches off the outer head. In the case of room or overhead mics, they’re generally placed around a meter away from the drumset.
My Final Verdict
Any good drummer or studio engineer will tell you, when it comes to recording drums, there are no hard rules set in stone. Plenty of practice over the years, as well as ear-training, are the best tools in your arsenal. When done consistently, you’ll be able to determine which helps you the most in securing that solid drum mix.
If you’re new to using drum mics, don’t bother about getting an expensive set. A more affordable starting kit, like the Shure PGA Drum Kit 7, will have all the mics that you would need to start working on your sound.
But if you’re a seasoned player, then you can’t go wrong with my personal favorite, the Earthworks DK7. No matter which one you choose, though, I hope you get lots of use out of it, and are able to make some amazing sounds with your new drum mic kit in tow!